Showing posts with label embroidery. Show all posts

Saturday, April 15, 2023

Hand Stitching

I love knitting and feel confident doing it, but I've long been interested in embroidery too... it can be so beautiful, don't you think? And what a wonderful way to message future generations.


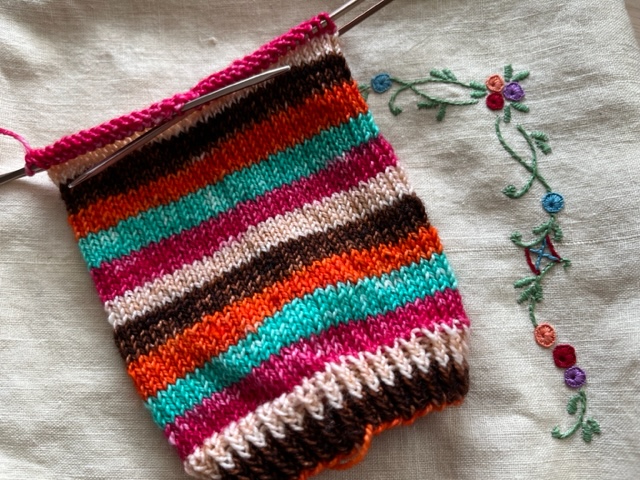
Years ago I'd go a little wild in Melissa Wastney's Tiny Happy shop, buying up whatever little bags she had sewn from scraps of hand-embroidered textiles to keep or give away as special presents. They still give me enormous pleasure in my knitting. I don't always match the stitching to the knitting inside, but sometimes it works out that way, as above.

Even though I'm fascinated by needlework, I'm not good at all of it. I can't effortlessly embroider flowers or even laboriously so (same problem I have with watercolour!) Recently I was visiting French General's site and saw an upcoming, online workshop with textile artist Mandy Pattullo. Alas, it was already sold out... but Mandy's got a book out! I decided to buy it, and also a second one about women's pockets.

When I unpacked these two treasures I noticed right away an unusual feature of Textiles Transformed: the cover, front and back, is almost flocked with a textile finish. Pure luxury. 


Inside, the pages are full of gorgeous, colourful images alongside advice and instruction on how to work with textile fragments and combine them into new, quilt-effect pieces. 


I think stitching away at such tiny, complex, fascinating pieces would be a wonderful way to pass an evening or an afternoon with friends.

The Pocket, by Barbara Burman and Ariane Fennetaux, is an entirely different proposition - much more focused on social history and women's history in particular, which makes it a hugely fascinating read for me. I highly recommend the 3-minute video I linked there. There are wonderful photographs inside this book, too. I particularly loved the one on the right on this page, showing the access point curved to hug the wearer's hand as she reached inside. Such a human touch!


This photograph shows how a pocket was worn under a skirt and accessed through a slit in it. And also, how realistically dolls might be dressed. Girls learned early the value and privacy of a pocket.

I wonder what it says about our modern culture that women no longer require such large pockets worn daily - or from another perspective, no longer have the ability to wear them, amid streamlined and fitted styles. Statement bags, so easily stolen, seem like a poor substitute once you've seen how this older system worked.

For now, I'm going to carry on with my sock project... it's been very busy around here the last few months and that's the most I can take on. But I'm finding it's lovely to curl up with these new books for as long as it takes to drink a cup of tea, and escape into the past and the possible.


Hope you're having a lovely weekend - see you here next Saturday!


Monday, December 21, 2015

Last minute makes: felted wool pins or ornaments

When there's just three or four making days left to Christmas, people who make presents are either flat out frantic or finished and suddenly wondering what other unrealistic goals we can set for ourselves.  So today: instructions for the felted wool pins I made this year.


It's a bit late at this point to offer somebody a Christmas pin unless you are seeing them, like, today - they only take a couple of hours to make once you have your gear together - but you can replace the pin with a string at the top and make it an ornament, or you can do something other than holly with berries and make it a pin for winter, like Jan's snowman:


If you start today there would still be time for you to gather materials, but if you're like me, you probably have them around the house already from previous projects (or laundry disasters).

Basically you are looking at felt, either from ruined wool sweaters - your own or from a thrift shop - or from a craft aisle in a bigger store, where you can buy it in colourful sheets.  Wool sweaters produce a thicker fabric but otherwise the process is the same.  It's just nice if one of the pieces isn't too floppy, so that the pin or ornament has some heft, so if you're using something really flimsy, you can add another circle to toughen it all up.


You will need:

Sharp-point scissors for detailed cutting
2 green holly leaves cut from felt, in 1" to 1-1/4" lengths
2 circles, at least one of which must contrast with both green and red, cut to about 2" diameter
(if you cut the back circle a shade bigger, you get a scalloped edged pin; otherwise it's flat)
3 tiny holly berries or 3/8" red bells - or you can make french knots with red thread
1 1" bar pin
1 needle and sewing thread
1 comfy chair and a good light

First off, you want to sew the pretty front of the pin.  Position the holly leaves as you wish (and I recommend having one of them overlap the border a bit at the tip), then attach them with a simple running stitch, with the first stitch coming up from the back so the knot doesn't show on the front.  Eventually I discovered that it's fastest if you start at the bottom of one leaf, then come to the top, stitch on the berries, then run down to the bottom of the second leaf.

If you use the very tiny felt berries - I got mine at Michael's - run your needle right through the middle so they don't tear off later.


Now it's time to sew your bar pin onto the back piece.  My stitches are always very sloppy and it doesn't matter with this design because you will be hiding it later.  See?  Messy:


And hidden.


And now it's time for blanket stitch, my favourite!!  This is where you sew the two sides together - pin side out on the back, holly side out on the front - and the key is to start your stitch just under a protruding holly leaf so that if you mess up with the ending knot it won't show.


Now you will begin to work your way around...


... tugging out any excess felt from the back piece with the tip of your needle to get the nice scalloped pie crust edge effect.  Or not, if you chose to make your two circles the same size.

When you're finished, all that's left is the wrapping!


Or you can tie your finished gift onto a wrapped present in place of a bow.

Tomorrow, with luck, I will have another Last Minute Make to show you - also with felted wool but you'll need bigger circles for this one - about 8" diameter.  No bar pins though!  Meanwhile: best of luck with your projects in hand. 


Tuesday, December 15, 2015

Embroidery with the incompetent

I really wanted to make a snowman pin for Jan, but I didn't have orange felt for the nose, and at a little less than two inches across the scale was way too small to do anything but embroidery to pick out the details.  Interestingly, even though I am terrible at embroidery, every time I showed him to somebody to ask whether I was messing up horribly this little guy evoked death-by-cute expressions and cries of "Can you make one for me?"


Answer: No.  If it hadn't taken over an hour to get him this far, and a complete fluke of bad stitching that resulted in the charmingly bent carrot effect, I would do tons - but as it is, I'm just grateful for photography so I can always remember my little snow friend.

As you might have guessed, things have continued to be crazy busy here at Hugs.

The house is completely under control - heavenly, even, after some changes resulted in a streamlined process toward a home we actually want to live in.  Our city building inspector is happy too, always a bonus!  And I'm learning a lot about construction and renovation and all the parts that go into a building - enough that Ray thinks it's a shame I'm not renovating another house after this one.  It's kind of like planning a wedding though - you can only learn to do it by doing it, and the whole point is to try never to have to do it again.  Not for yourself, anyway.

The condo is looking pretty great too because other changes resulted in me taking on a major clutter reduction project.  As I type, I do have a few things that have to go down to the storage locker (which is already full, hence their presence behind the sofa) and a couple of bins with lids waiting for soft objects to be stored in them, but I also have a Christmas tree in its stand just waiting to relax enough for lights and ornaments.  YAY!!

I've known for quite a few years about a Christmas tree market that sets up on the north side of Front Street, aka across from the St. Lawrence Market, but it has never occurred to me to buy a tree there, or even one of the gorgeous wreaths they sell.  We always get our stuff from the grocery store.  Today I walked past the tree market for the second time in a week and thought, why are we not shopping here?  So we did and it was awesome.  Pete and I picked a tree in no time, got a fresh cut for the trunk, and carried it home (two doors away, basically.)

That's something I really appreciate about this building - it's on a block that is extra wide, with not one but two lanes included in it that have been turned into pedestrian walkways.  Because I have older relatives I know what an advantage it is to be able to get errands done on foot without ever crossing the street once your legs get unsteady.  Admittedly I'm not likely to carry a Christmas tree home when I'm 85, but I do think there's something to be said for hanging onto this condo once the house is done, so we can move back if stairs get to be too much for us.

I mentioned this to Bob and he said well, but surely it would be a bit big for you to retire to.  I made no comment.  Bob doesn't knit, so he doesn't understand about the concept of Yarn Stash and the space it takes up.  After a moment I pointed out that it would be good to have a guest room in case friends came to visit.  This, he can't argue about, because he's slept on our sofa often enough.

Speaking of stash: that's the next big clutter reduction installment.  I keep coming across yarn I've had for ten years at least, and never knit with: I don't want to start out in the 'new' house with all that baggage, so I'm going to deal with it now.  I just think I'll enjoy this condo experience more if I'm not looking at a wall of boxes all the time.

And speaking of a wall of boxes... we have one, again.  I worked SO hard to unpack enough not to have to look at one of those as I fall asleep at night, but then Restoration Hardware had a sale, and some of the bathroom stuff we want was so hugely discounted it didn't make sense to wait to get it.  Yesterday the concierge called to say I had five boxes at the front desk and when I went down expecting to see, oh, five small book parcels maybe - I suddenly remembered what I'd done.  The five boxes were massive!

The upshot is, we are now storing five sets of bathroom light fixtures and four train racks (for towel storage) in the bedroom, because the storage locker - yeah, I mentioned that didn't I.  It's full.

With so much going on beyond the usual day to day meals have been pretty disorganized.  But this weekend Pete offered to go to a new pizza place he'd liked when he tried it.


The other pizza place I liked had closed, but this one is pretty awesome!  I think I'm not really a fan of giant uncooked basil leaves on the top of my pizza, but my goodness they look beautiful, as did Pete's arugula.  Also the pizzas were delicious.

Okay, before he melts, let's take another look at our little snow friend.


The trick with a Christmas pin is to give it to the person who's getting it long enough before Christmas that they can get some use out of it.  I am pretty sure Jan waits till Christmas Day to open my present, so I put the snowman on the front of her bag - that way, she can take it off and wear it now.  And hopefully later too - after all, it's winter, and snowmen are all about winter, right?

I didn't say how I stitched this guy.  I got the snowballs onto the blue background with running stitch in regular white sewing thread, then stitched in the bits of coal with regular black sewing thread.  I used sort of a backstitch for the stick arm that shows and then improvised another stick hand resting on his other hip.  The carrot nose is a bit of orange stripe from some Vesper Sock remains, and the red scarf is actual shiny embroidery floss.  The only part of the scarf that really worked was the tail, and I love it, and am so grateful because it elevates the rest of him.  Finally: blanket stitch for the backing.  If you cut the backing a little bigger than the front and then blanket stitch them together, you get that lovely scalloped edge.

I'm never going to win awards for my embroidery, but you don't need to be an expert to pull off folk art, thank goodness.

Okay, that's it for me today!  Take care of yourself and I'll be back again as soon as I'm able.