Showing posts with label Last-minute gifts. Show all posts

Saturday, December 2, 2023

The tree is up

Last year I was overwhelmed in the run-up to Christmas and it felt like one more chore to do. This year: BRING IT. I am so ready for the break, and I am all about the nostalgia.


This is a mini mitt I made in a class on twined knitting. I think I made a full-sized pair to give away, but that might be dreaming on my part because we all know what a selfish knitter I am, making things mostly for my own use because I can't bear to part with whatever it is. 

The thing about twined knitting is that you have to twist two strands of yarn around each other with every stitch. The natural and comfortable direction in which do this, for me, is the same direction in which yarn is plied, which results in impossibly twisted-up balls of feeder yarn you have to constantly stop and address. The solution to this problem is to spin your own yarn, then ply it in the opposite direction such that twining is simple and straightforward. 

So, yeah. If I take up twined knitting again, it means taking up spinning again, and that honestly is not a bad outcome for me if I can just clear enough of my calendar. I loved both those things a lot. 

Another thing I loved back in the day: Magic Cookie Bars. And I made some last night, for the first time since I was a teen, probably.


In my shift away from processed foods I forgot how completely decadent and delicious these things are. Just the aroma coming off the pot where I melted butter and then stirred graham cracker crumbs into it was Wow. And once you have that pressed neatly into a pan, you pour sweetened condensed milk over, then top that with chocolate chips and coconut? I mean... how can you not eat the whole thing? Thankfully you can freeze the squares and they keep for three months, so there is some reprieve from overdoing the sugar load.

One of my big jobs for 2023, apart from organizing a tiny home (which was not on the agenda in January when I developed this year's life goals) was decluttering our house. Technically I started that job in November but there are so many cupboards and cubbyholes to address I clearly needed the extra time. I'm STILL not done! But this week, going through a junk drawer, I found two more of the precious felted wool Christmas pins I made years ago. 


I loved these too and now that the tree is up and I have Official Festive Lighting, I am going to reexamine some decluttered craft nooks and see if I can't find the gear for these projects. I know I have more tiny bells and felt pieces and embroidery thread somewhere. 

If you'd like to give them a go with your own scraps and backing pins, my mini tutorial is here

One thing that isn't nostalgic here is this year's wreath, a departure from our usual plain green boxwood over the living room fireplace mantel:


The florist didn't have our usual size in anything but this version with glossy red faux berries, so we agreed to be spontaneous and break tradition. Normally the wreath lives on the wall all year, fading to sage for Easter and gold for Canadian Thanksgiving (October) before being renewed in December. Not sure how the red berries will play for all that, but they're only wired on, so if I get to it fast enough in January before the boxwood is too dry and brittle, I might be able to remove them.

I should just be sure not to indulge in too many sweets first because I will need a steady hand, heh.


I hope your holiday plans are coming along nicely and feel more like an indulgence than a responsibility. Pretty sure we could all use whatever break we can manage. Thanks again for spending this time with me, and I'll see you here next Saturday!


Friday, December 9, 2022

December tea is better than any other

Time to break out the winter mugs!

holiday mugs with a blue-grey-green snowy day print
Houses and trees: two of my favourite things

I picked these two because I loved the theme and artwork, but when the second arrived I was amazed by how similar they are, right down to the colours. I really have a type, don't I. I bought the one with the cheery Joy to the World message from Anthropologie last year, and the attachment is real. The glaze, which is glossy and smooth, covers clay with little indentations pressed all over it - no matter how you hold it, your fingers fit into a perfect spot, and it just feels so, so nice. I was able to get another from Anthropologie later, in a summery floral, with a similar texture. The one in the rear is from Rifle Paper Co. It holds more liquid, and the handle is big enough for my whole hand! I can warm my palm and fingers and feel that reassuring embrace from the handle as I drink.

Mugs are the sort of thing that multiply in a cupboard, aren't they. You have to be selective about which ones you're willing to provide with real estate. Still, ugly or cute, it's tough to pass up the ones that nestle into your grip or are the exact right size for your steaming beverage of choice. Treating myself to seasonal mugs makes every tea or coffee break feel that little bit more special. 

I will keep drinking from both of these clear through to March, because why limit trees and snow to the holidays? That said, they will be getting a very serious workout right now, as I take a break for tea and knitting after all the hard work I put in this year. And when I say hard work, I'm obviously not talking about Hugs because my goodness when I popped in here today it was tumbleweeds. The pattern files are busy all the time, even in the off-season for knitting, but I have seriously neglected this little corner.

You should be grateful really. This year I focused on writing like it was a 10-hour a day job, so my quietness has spared you my struggles with plots and character arc, heh. And I have almost enough to show for it all not to regret the sorry state the house got into while I ignored it. 

To whit: a complete revision to one novel, and a second novel written and polished. Five short stories, one of which was accepted for publication (it'll be out in spring 2023). Finalist slots for one of the novels in two different writing competitions. So many writing courses I can't remember them all, and loads of new friends and acquaintances in the writing community, some of them in my new critique group no less. The other writers there are absolutely lovely and it is such a pleasure to meet with them every month - I'm hugely grateful for my good fortune. I'm even on the Board to run the Speaker's Bureau with Wrona, who enticed me to join the Los Angeles chapter of Sisters in Crime, an organization promoting women in crime writing. My little taste of warmth and sunshine from my cosy house in Canada!

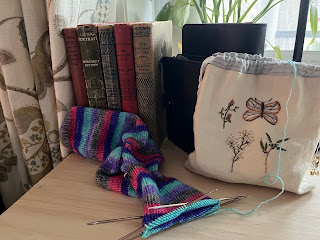
Now I'm taking a breather from everything, to frantically knit a pair of Christmas gift socks.

handknit sock with embroidered knitting bag in front of vintage mystery novels

I've had a collection of these bags,
embroidered by Melissa Wastney, for years now
and they still make me smile

I should have the socks done and blocked by Sunday night, in time to start the gift baking, if I can find a few more movies to keep me stationary long enough. I have enough audiobooks to take me clear through to New Year's but sometimes it's nice to have the visual, isn't it.

If you're looking for some quick knit gifts to pull together yourself, a tiny storage pouch or a cosy unisex cowl might be just the thing. Take a browse through the pattern page and see if anything suits - and bear in mind, the specific yarn I used might be discontinued, but yarn weight and gauge are forever.


Either way, I hope you have a wonderful December, and that you'll check back again soon. My goal for next year is to weave regular Hugs back in amongst the other writing projects. I'd love to have you with me!


Tuesday, December 20, 2016

A felted wool Christmas project

Hi again!  While I've been off not writing a new Hug, I've been very busy sewing some:


I never get tired of looking at these so bear with me while I post many, many pictures to remember them by, now that they've all been sent off to their new homes.  These pins are so simple to make.  Also, they take less than two hours each, some of which can be done well in advance and all of it in stages.  So technically there is still time for you to come up with some yourself, if you are looking for a little Make to top off a gift this year.  Really, they are the gift in my case, though I did add a little chocolate to sweeten the deal.

I've made these before, many times, and last year I did a detailed tutorial here.  But this year I went all-out and made 9 of them at once.


Okay, it was a little crazy around here while I did this.  Even though I had some felted wool ready, and some previously-cut circles and other supplies, I added a new design (candy canes) and anyway: sheer volume.  I spent all day Saturday making the tops and sewing on the pins, and all day Sunday sewing the backs to the fronts with blanket stitch.  And yet.  After walking around blankly for nearly two days, I'm thinking of doing a few more in an Ornament version with a loop for hanging, instead of a pin for wearing.

Pretty sure this is the sort of assembly line we can all get behind:


There would have been a lot more candy canes but MAN those turned out to be hard to cut properly on this scale!  Holly leaves are so basic and easy to trim, but you can ruin a cane with one wrong snip.

Also, the candy canes require many more stitches.  They are simple - all I did was to bind down the white felt with slightly angled stitches all the way from the tip of the cane to the bottom - but it takes a while and I did rip out a lot as I went, to get the angles just right.  The glossy sheen of the embroidery thread I used was SO beautiful, it would have showcased any errors in judgment.


Also the bows on the candy canes were a bit tricky to cut, and I wasn't sure at first how best to stitch them on.  There's a close up further on and you can see what I ended up doing.  First though: PROGRESS.


Sewing on the pins, very late on Day 1.  (innovation alert: last year, I sewed the pins at the middle, but this year I put them on at the top so there is less flopping during use.)

They look so neat and tidy from this angle, but actually: I am terrible at hand sewing.


Bleah.  People who are really good at embroidery can produce worth that is as lovely on the front side and the back, and I envy them.  Maybe some day I will take a course.  I mean, check out the best of my candy cane stitches!


Gah!  I have no idea how they could look this bad when they look so normal on the other side.

However.  I did come up with some valuable additions to the craft this year, like a wider variety of colour options for the holly pins:


You really want a good stiff felted wool for the back of a pin and a thin one with low pile for the front.  The low pile felt is easier to get your needle through and it shows off your embroidery; the thicker stuff at the back keeps the whole pin stable.  Also, the low-pile stuff is what you can buy easily in a craft store, and using it allows you to eke out the harder-to-come-by thicker felt.  For that, you really need to find inexpensive, sometimes motheaten sweaters in a thrift store and felt them at home.  But the holes from moths don't felt shut in the process, which limits your materials in the end.

At the same time: if you have felted a sweater that is dark green and you have scraps left over, how many opportunities are you going to have to use it?  And how much is a black thread stitch going to stand out when you are setting it in place in the form of holly leaves?


The candy canes are all pretty similar to one another:


I was trying to stretch out my supply of light green felt for next year so I used a little blue, but when it came to the point, I had to keep the blue one for myself.  It is SO CUTE, and I am so selfish .  And conveniently enough, now I can show you the simple straight stitches, forming a box, that I used to secure the bow to the pin.


The other thing you can see here is the blanket stitch I used.  It's a little inconsistent on this pin but it's more inconsistent across all the pins.  The rule is: whatever spacing and distance from edge to inside you start with, is the spacing and distance you should go on with.  I try to consider how far the decorative felt comes toward the edge and keep all the stitches within that range.  In this case, I was stitching right up to the bottom of the cane.

Stitching tip: it's best to sew this things with a sufficiently heavy-duty yarn or thread to allow you to work with a single strand (rather than having to loop it through the eye of your needle and tie both ends together into a knot at the end.)  That makes it SO much easier to rip out, when you find you put a stitch or two wrong and want a do-over.  Ahem.  (there is a reason there are so few pins incorporating thin white thread, doubled.)

Another stitching issue is how you close it all off at the end so it doesn't unravel. I did a little series of knots along the back edge, which shows, but not when you're wearing it.


The trick is to match your thread to the fabric you are using on the back.  I decided to stick with black button thread this time around, because I couldn't find my stash of stripy sock wool scraps, but black works for the other three of backing fabrics I used this time.  See?


It really only looks bad on the red backing, which came from a lovely red boucle Chanel-style dress cardigan that somebody mishandled horribly in the wash, to my benefit.

Group shot!


I used these ones to top off a gifts of a small bar of almond bark from Soma, a chocolatier here in Toronto, but I gave one to Carol too:


There's a hat* in this little parcel if you can believe it, as well as some more Soma chocolate and a large square of sea-salted chocolate from France.  I really think the wrapping is as valuable as the present inside - certainly it gave me a lot of pleasure to put together!  Well worth the purchase of fancy tags and un-fancy twine.


* I knit three of these hats four years ago in January, intending to give one of the red/brown stripies to Carol the following Christmas, but I had another idea for her by then, and every winter since has been kind of mild, so I held off.  This year is supposed to be freezing, so I decided it was Time, and it fit her, and she loved it.  Yay!!!  I got to give a hand-knit gift this year, without having to hand-knit it this year.


And that's me for today.  I hope you are well and your stitching fingers unblemished, and I will try to pop back in again this week because I have some other yummy knitting projects to show you.  Either way, take care till we meet again!


Wednesday, December 23, 2015

Last minute makes: felted wool trivet

If you have felted wool around and find very basic embroidery stitches soothing, then this is the project for you! 


It doesn't have to take long, and a felted wool trivet is infinitely customizable - for a tea service, for a kitchen, for a favourite mug - in whatever size suits the need and the available fabric.  My fabric supply is mostly from sweaters purchased at Goodwill to ensure I'd have a stash of emergency gift materials and not at all because I am overly optimistic about how many projects I can take on in a year, ahem.

For a tea trivet, you'll be aiming for a circle or square about 6.5" across.  I like a circle, because I can run my rotary cutter neatly around an overturned sandwich plate, and I find blanket stitch more peaceful when I'm tracing a curve.  If you don't have a rotary cutter straight lines are a lot easier to cut - so square is your friend.


While you're at it, why not cut a few?  You'll need two circles (or squares) for each trivet - one for the pretty front, and one to hide the ugly stitching on the back of the pretty front - and it doesn't hurt to have a few in storage for real emergencies, like needing a reason to calm down with blanket stitch, or a gift for somebody who really does have everything except something hand made, by you, for the kitchen.


See that circle on the top with the sort of ridged design?  It was originally a wool vest, seriously cute with buttons down the front, but when I found it the years had taken their toll - it was sadly shrunken and in possession of a hole.  However: the grey was the perfect colour for my project, and the ridges were inspiring.


How often do you get a fabric with built-in guides for Japanese-style running stitch patterns?

There are so many options for running stitch, like these tiny examples I did when I was making bookmarks:


Or, you could applique designs onto your trivets, as I did with this improvised bird backs on a pair of felted wool mittens:


Still love these mitten birds SO MUCH years after giving them away... they are worn out now, apparently, but I bet the birds held up!

Okay: back to work.  Sadly I accidentally deleted the photos I took of the process, but I can tell you I paired the flimsy grey wool with a serious, thick black wool for heft and for better countertop protection.  To give me a guideline for how close to the edge my running stitch could go, I pushed standard-size paperclips onto the edges of the grey felt.  And when I was done, I put the two pieces of felted wool together with the right side out on the embroidered front, and blanket-stitched them shut.  You don't need to be perfect with the blanket stitch, either:


However, it is a good idea to press the finished trivet under a damp cloth so it goes flat, heh.


I am so excited about this trivet, even though it is not nearly as pretty as the turquoise and red one I made and can't find to photograph for you.  Or as clever as the one with the steaming teacup (appliqued sweater cuff for the cup, needle felted fleece for the steam) which I also can't find.  Why?  Because this trivet is a custom match for my aunt and uncle's gorgeous granite countertop! 

The counter is primarily the colour of the yarn I used - the mere fact that I had something that graduates in and out of different shades of honey is a miracle - and the rest of the counter shows veins of dark grey and black.  These two have everything and are at the point in their life where they are downsizing, but they do enjoy tea and coffee together daily.  I'll pair the trivet with some delicious cookies and wrap it up with ribbon: how better to offer love and good wishes?


This trivet took me about three hours to make, from cutting to not quite pressing.  You can save time by choosing a patterned sweater for one side of your trivet (no extra detail required) or by topstitching around an applique shape, like a heart or something.  Or by not being so fussy every time the running stitch comes out looking wonky.

Well, that's it for me today.  I have wrapped absolutely nothing, I have baked even less, and I'm supposed to be going to a birthday party tomorrow.  So off I go, shaking slightly with panic, and wishing you a wonderful Christmas Eve to come!


Monday, December 21, 2015

Last minute makes: felted wool pins or ornaments

When there's just three or four making days left to Christmas, people who make presents are either flat out frantic or finished and suddenly wondering what other unrealistic goals we can set for ourselves.  So today: instructions for the felted wool pins I made this year.


It's a bit late at this point to offer somebody a Christmas pin unless you are seeing them, like, today - they only take a couple of hours to make once you have your gear together - but you can replace the pin with a string at the top and make it an ornament, or you can do something other than holly with berries and make it a pin for winter, like Jan's snowman:


If you start today there would still be time for you to gather materials, but if you're like me, you probably have them around the house already from previous projects (or laundry disasters).

Basically you are looking at felt, either from ruined wool sweaters - your own or from a thrift shop - or from a craft aisle in a bigger store, where you can buy it in colourful sheets.  Wool sweaters produce a thicker fabric but otherwise the process is the same.  It's just nice if one of the pieces isn't too floppy, so that the pin or ornament has some heft, so if you're using something really flimsy, you can add another circle to toughen it all up.


You will need:

Sharp-point scissors for detailed cutting
2 green holly leaves cut from felt, in 1" to 1-1/4" lengths
2 circles, at least one of which must contrast with both green and red, cut to about 2" diameter
(if you cut the back circle a shade bigger, you get a scalloped edged pin; otherwise it's flat)
3 tiny holly berries or 3/8" red bells - or you can make french knots with red thread
1 1" bar pin
1 needle and sewing thread
1 comfy chair and a good light

First off, you want to sew the pretty front of the pin.  Position the holly leaves as you wish (and I recommend having one of them overlap the border a bit at the tip), then attach them with a simple running stitch, with the first stitch coming up from the back so the knot doesn't show on the front.  Eventually I discovered that it's fastest if you start at the bottom of one leaf, then come to the top, stitch on the berries, then run down to the bottom of the second leaf.

If you use the very tiny felt berries - I got mine at Michael's - run your needle right through the middle so they don't tear off later.


Now it's time to sew your bar pin onto the back piece.  My stitches are always very sloppy and it doesn't matter with this design because you will be hiding it later.  See?  Messy:


And hidden.


And now it's time for blanket stitch, my favourite!!  This is where you sew the two sides together - pin side out on the back, holly side out on the front - and the key is to start your stitch just under a protruding holly leaf so that if you mess up with the ending knot it won't show.


Now you will begin to work your way around...


... tugging out any excess felt from the back piece with the tip of your needle to get the nice scalloped pie crust edge effect.  Or not, if you chose to make your two circles the same size.

When you're finished, all that's left is the wrapping!


Or you can tie your finished gift onto a wrapped present in place of a bow.

Tomorrow, with luck, I will have another Last Minute Make to show you - also with felted wool but you'll need bigger circles for this one - about 8" diameter.  No bar pins though!  Meanwhile: best of luck with your projects in hand. 


Tuesday, November 25, 2014

Gift ideas for the frantic knitter

This is that magical time of the year when stores decorate with festive looking greenery, and shelves fill with special foods for even special-er family gatherings, and people like us tear out their hair wondering where their next finished gift knit is coming from.

Speaking for myself: I have no idea, especially now that it's dawned on me that I have to paint every wall and ceiling of a 1550 square foot condo before New Year's, on top of everything else.


So let's look at some backup gift ideas, shall we?  The kind of ideas you can dream up while you are taking care of other important parts of the holiday, and research between other errands, and execute when all hope of a completed gift knit is gone.  The kind, I might add, that are ideally suited to people equally swamped and already as surrounded by possessions as we are by yarn stash.

Disappearing Acts: When it comes to the person who has everything and no place to put it, there is nothing so perfect as food or drink.  Choose staples that your recipient is sure to enjoy, but upgrade to something fancier, as from his or her usual grocery store breakfast tea to a really fine imported breakfast tea.  That way it's not so different as to jump out of the routine and go unused, but special enough to feel like a treat.

Services Rendered: Yes, you can offer to knit socks for somebody you didn't have time actually to knit socks for - unless, like me, you maintain a policy of not letting gift knits extend past the official day for giving them.  We have other skills besides knitting, people!  Pick one of your best, and offer it to somebody who could use it.  Maybe you could wrap up a date to overhaul somebody's office storage, or source actual sofa sized pillows to fit into the covers somebody else bought on holiday and has never used, or consult on website design, or set up a great defense against raccoons in the garden.

(although actually if you know how to do that, feel free to share in the comments as a little present for everybody.  and in response, I will share that over the weekend I sat watching a squirrel trying to eat a giant red dog toy, apparently under the impression that it was a very large nut.  okay, stop reading this and get back to the list.  we are frantic and have gift planning to do!) 

Take a Class: This is a little bit related to services rendered - if you're really, really good at something, maybe you could offer to teach a friend or family member how to do it too?  This only counts if you're good at something really fun, though.  I mean, I'm really really good at cleaning the kitchen and getting the garbage out in about 15 minutes while listening to audiobooks, but nobody would want learning that as a gift.  Alternatively, you could buy somebody a chair at a class that has nothing to do with garbage or cleaning.  Better still, you could buy two seats and tag along, because if your best offer besides knitting is garbage and kitchen cleaning, you could probably stand to branch out a bit.  Note to self.

A Lift: got a friend who can't get around so easily, owing to lack of transportation or mobility generally?  Wrap up a card for a regular date to drive to someplace helpful, like the hairdresser's or a knit night or IKEA.  (seriously, even if there's one in your very own city, getting to IKEA in a roomy car is a Thing.)

A Night Out: I don't recommend actually booking tickets and wrapping them lest your giftee has arranged a cruise for the date in question, but if there's a show coming to town you know would be high on his or her wish list, wrap up a calendar page or two with possible evening or matinee dates and make the call while you're together.

Time: If you're not able to take on somebody's home office organizational overhaul, maybe you could create time for him or her to take care of it personally.  By, for example, weeding the garden or watching the kids or making supper or taking stuff to a charity shop.  Or, perhaps, painting a condo for somebody who should really be working on a novel instead.  (Kidding!)

Gift Cards:  When they first came out, gift cards struck me as being cash that's tied to a particular store. Then I was given coffee cards at a time that coincided with often having to kill time in coffee shops regardless of whether or not I had change or small bills, and Whoa.  Those cards make life SO much easier.  And have you seen how cute some of them are?  Pair one with something cuddly, like a pair of festive magic gloves or a deluxe chocolate bar or a cashmere-blend superfast hand knit Earbud Pouch, and you are good to go with a personalized but crazy easy present.


Maybe none of these ideas are viable for you in which case, please accept my best wishes for getting all your gift knits done with time to spare.  Maybe one of them will give you a different idea, in which case I'd love to hear it.  Either way, knit responsibly, because the last thing any of us needs right now is a sprained wrist or sore grip.

Tomorrow: with luck, the new hat pattern.  Send good thoughts!


Tuesday, September 23, 2014

Earbud pouch: a free knitting pattern

January 2018 update:  Just a quick note to say that when I put hours into designing Hugs patterns to share, and publish them with the words "For Personal Use Only" added, it's with the dream that they will be knit and shared all over again out of love and generosity and not for profit on Etsy without even crediting me as the designer.  Ahem.  And now to the original posting...  and happy knitting!


I'm so happy to be able to share this giftable little knit with you well before peak gift-giving season:


As usual, this portable little pouch for mobile phone earbuds was born out of me needing something for myself, but right away I saw the potential for other knitters.  Who doesn't want to make something useful, completely giftable, and luxury-yarn-end stashbusting to boot?  Especially when you can do it in the time it takes to watch a movie.


None of this fiddly casting on three stitches to work in the round business - the pouch starts with a manageable cuff and works down to a grafted bottom.


And because the increases and decreases are at the side rather than all the way around, the pouch lies flat, which takes up less space in in a purse or a pocket.


On top of that, how perfect is this little pocket for a pair of earrings or a ring, wrapped up in tissue and tucked inside?  The recipient can use it later for stowing jewelry safely while traveling.  Or what about a child tearfully losing that first tooth, comforted by an especially cuddly envelope for tooth fairy transactions?


Oh, who am I kidding... these things feel so great to knit I would make them just to stop a chair leg from scraping the floor (and hey, I bet that would work too!)

The pattern as written is for a specific sport weight yarn, knit at a pretty tight gauge on 2.5mm needles.  However, that's just to make the writing-up easy.  I've been using other sport weight yarns, of course, and fingering.  But you can also try something a little closer to lace weight (I used Twisted Fiber Art's Arial yarn here.)


Originally when I posted this pattern, I gave the following project notes for fingering weight... but now I realize fingering works just fine for the pattern given.

For lighter-than-fingering on the other hand, I go down to a 2.25mm set of double pointed needles, and cast on 8 more stitches than the pattern calls for.  Instead of increasing three times at the end of the cuff, I increase four, and I start the decreases at 20 rounds or - if I'm using a yarn sample from Twisted Fiber Art - when it looks like I might be starting to run out of yarn.  You can decrease by eye because nobody's double checking your conformity, and simply end when you think it looks right or when you suspect you have only enough yarn left to do the grafting.  You might end up with a stumpy looking pouch...


... but trust me, you will be able to fit earbuds in there, and they won't fall out.


Difficulty Level
Not quite beginner, but still pretty easy.  The pattern is knit in the round.  It uses raised increases, which are thoroughly described if you haven't done them before.  It also involves grafting by Kitchener stitch (and is probably a great way to practise that.)  Instructions for Kitchener stitch are included as well.

Materials 
Any sport weight yarn - about 12 yards of it.
2.5mm double pointed needles, or size to get gauge.
darning needle

Gauge 
34 sts, 48 rows = 4” in stocking stitch
  
Finished Dimensions 
2 7/8" tall, 2 5/8” wide

Monday, February 24, 2014

Sometimes knitting takes faith

Not too long ago, Lynn sent me a link to a quick pattern she thought I might like.  She was right, and in a weak moment when I realized I had bonus time in my schedule, I dug out some yarn leftovers and cast on.


Sometimes you just have to be optimistic about a project like this, because what it looks like in-progress might not bear any similarity to the picture on the pattern.

Also, it might require extras like embroidery to get closer to the stated objective.  Or maybe something not like embroidery that, if you're me, you're just too lazy to do when you already have a yarn tail in there just asking to be used for something.


It's a good thing I got out to Stitch for irresponsible shopping in January though, isn't it?  Because I really needed super thin felted wool for this project.  Also a good thing: the fact that I picked white felt.


We're not going to talk about how long I spent sewing the felt on with black scrap yarn, because I will cry.  I just don't have the skills to embroider two things that have to look the same, like eyes - you know, you have to bring your needle through the fabric at just the right angle and one slip results in a completely different expression than what you were aiming for, to say nothing of how fragile a small circle of wool felt can be.  In the end I had to ditch one white circle entirely and start over. 

(Let's also not talk about why I keep trying to make two things that look the same, each with two eyes on them.  Why not two different things?  Why not, Mary??)


Anyway, I did get there with the embroidery, which led to the moment when I could feel very sensible for not having been emotionally equipped to toss the short scraps left over from trimming the ends of a woven scarf or three.


Probably I'm just making a moth's nest putting this much wool together, but on upside, yarn scraps as stuffing are super squishy and environmentally friendly.

Still.  Are we thinking Veggie Tales at this point?  Because I am totally thinking Veggie Tales.


Never mind - one must have faith in one's knitting.

You close the top of these things with Kitchener Stitch, which makes a lovely finish.


and: voila!


Owls!

No?  Not owls?  Okay, maybe rocks with red pants on?  How about little fire demons?  Or maybe, getting back to the Veggie Tales idea, aging red peppers with faces on?

Eh, I messed up, but I still think they're cute.  And each one makes a great stress ball - must remember to throw one into my purse before my next dental appointment. 

Pattern: Owl Puffs, by Jenna Krupar
Yarn Scraps: DK weight wool, DK weight wool/cashmere blend
Needles: 3.00mm square needles for a nice tight fabric
Stuffing: DK weight scrap yarn


Hope you had a lovely and refreshing weekend, and I'll see you tomorrow!